HOW DO YOU MAKE A NEAT WOODCUT!?!?!?!
Step by Step: My Super Neat Woodcut Process
STEP 1: WHAT MATERIAL AM I GOING TO USE?
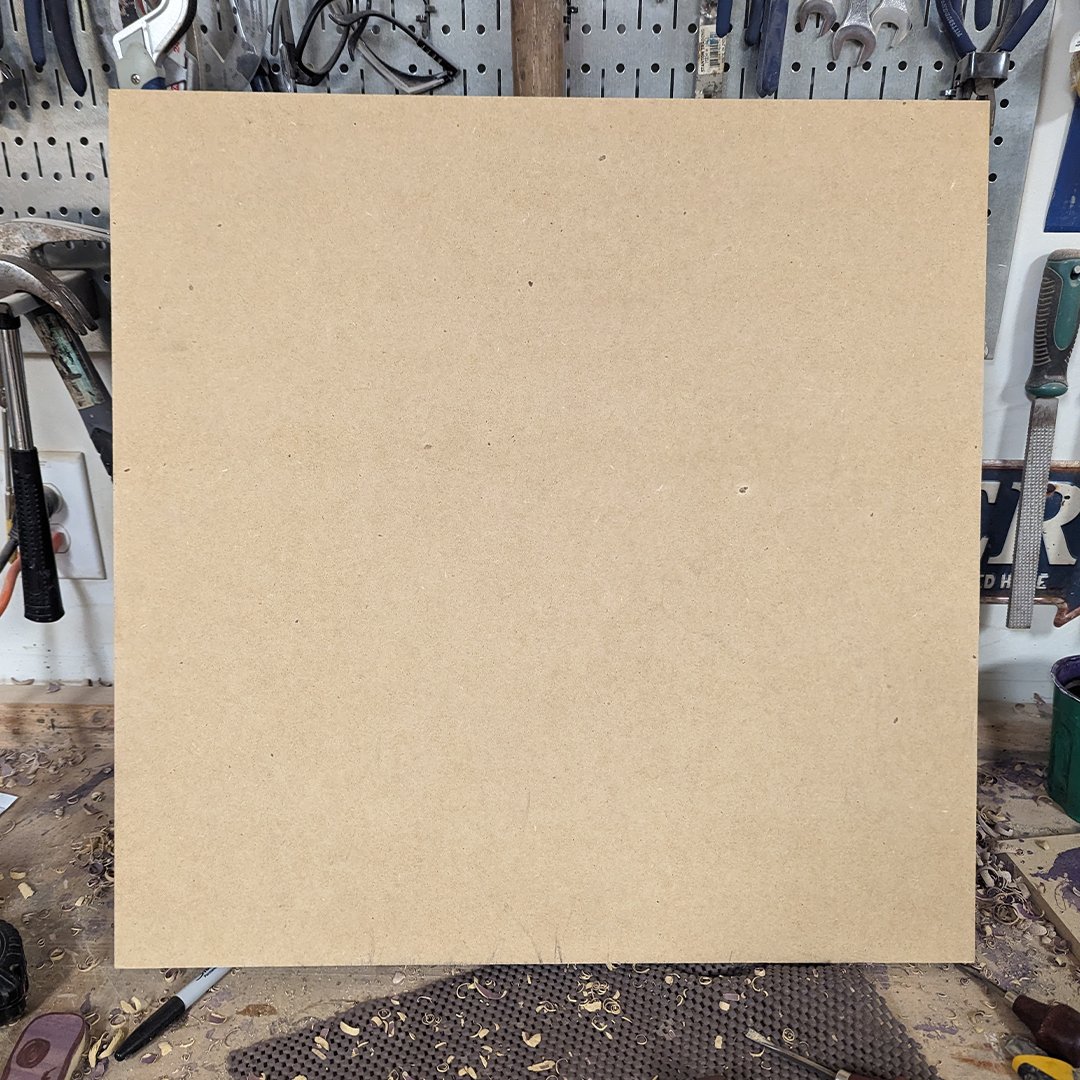
The project always starts off with a blank piece of wood. I typically use, poplar, maple, walnut, plywood, MDF, and various other hardwoods. In this case, I started out with a half inch thick, 24x24 piece of MDF.
WHAT THE FUCK IS MDF?!
(Medium-density fiberboard (MDF) is an engineered wood product made by breaking down hardwood or softwood residuals into wood fibers, combining it with wax and a resin binder, and forming it into panels by applying high temperature and pressure.) AKA science wood.
STEP 2: SKETCHING/DRAWING
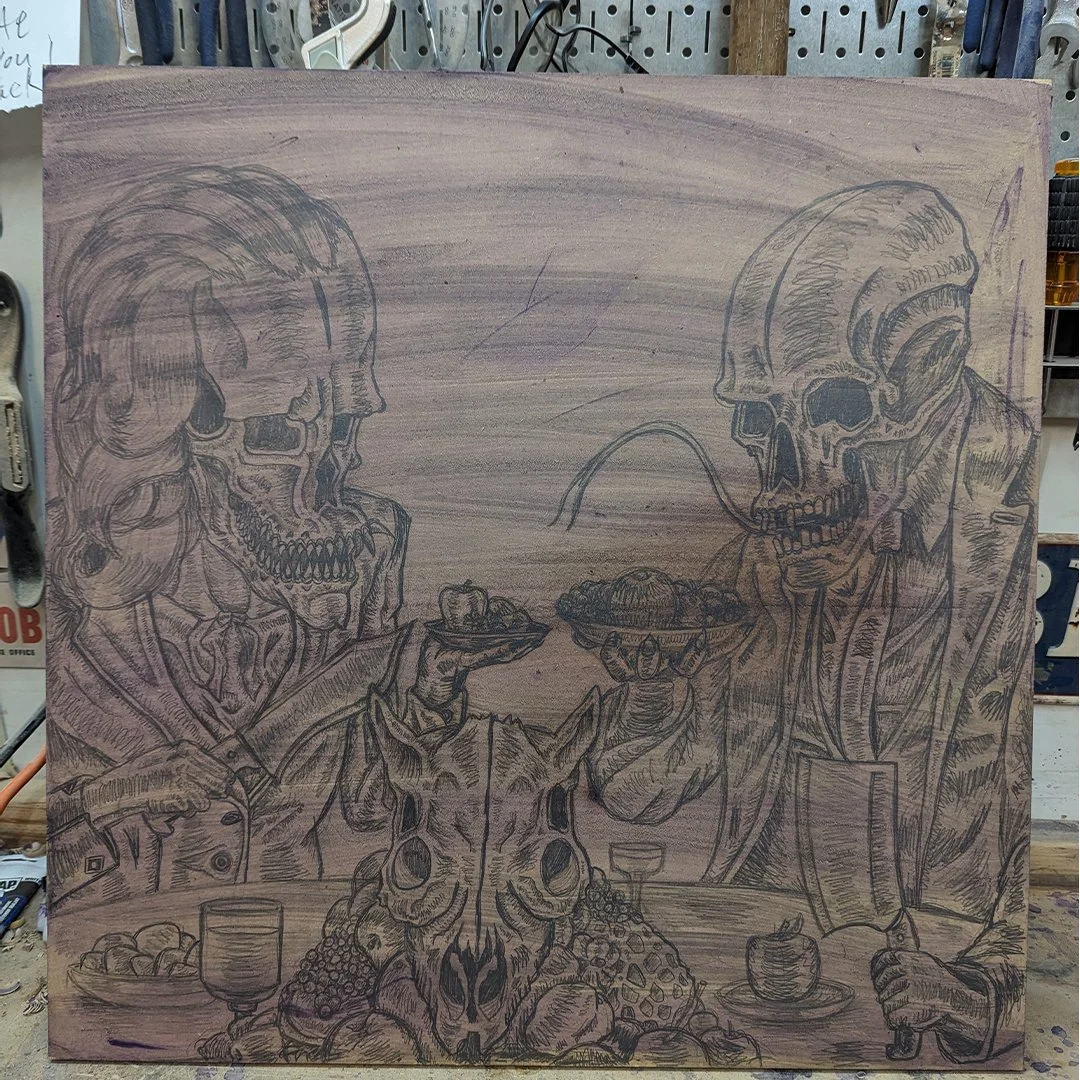
After the board is chosen, and cut to size, I start the drawing. In this case, I made a rough sketch which you can see on the right hand side of the board. I then refine the drawing as I continue work on the piece.
NOTE: Everything that is drawn will NOT be carved out.

I usually start working from left to right. I especially do this on larger pieces because my hand will smudge the pencil marks while working and make it harder for myself to determine what needs to be cut out later on.


STEP 3: INK WASH
After the drawing is finished, I place an ink wash over the drawing. I take ink and water it down to be slightly transparent. If its too dark or opaque it will cover the drawing and we don’t want that to happen. This ink wash allows me to see what I have to carve and what has already been carved.
STEP 4: CARVING
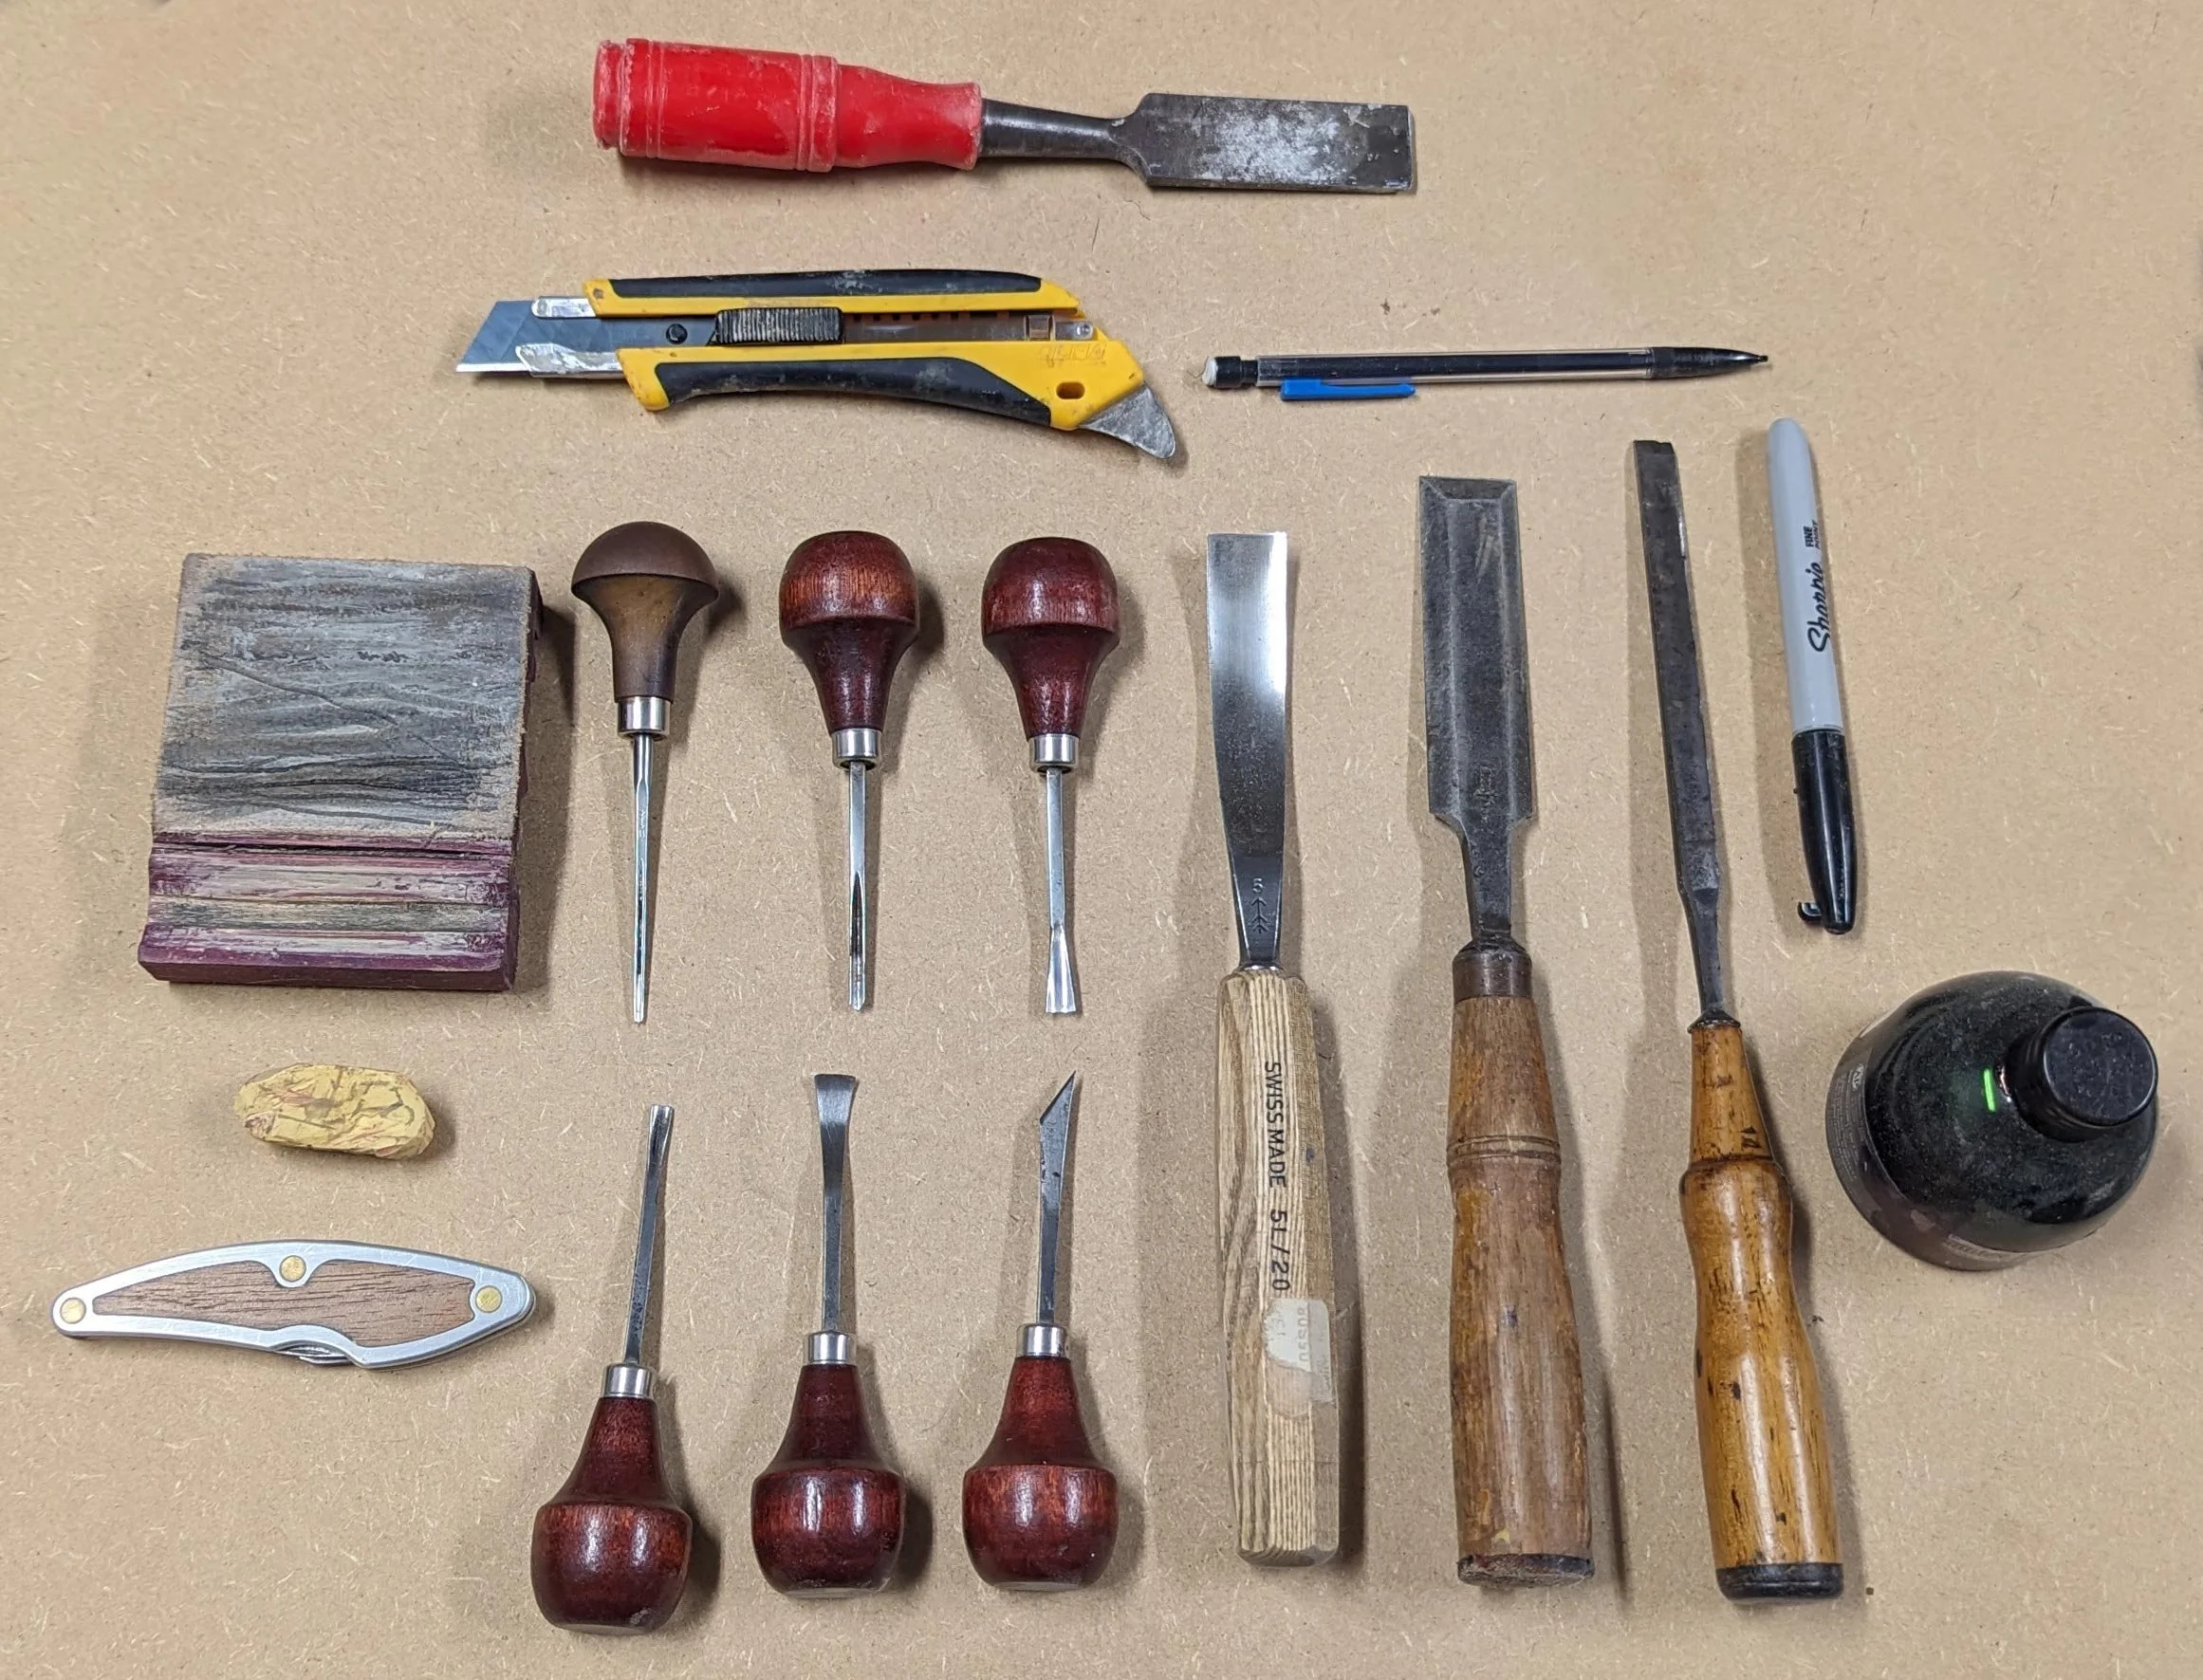
The carving process is the most fun part in my opinion. I ALWAYS hand carve my woodcuts and I never use a Dremel, Lazy Cutter aka Laser Cutter or any power tools with the exception of cutting the raw material down to size in the beginning. I carve with a variety of gouges, chisels and knives. (Some examples of the tools I use are pictured below) Each tool makes a specific mark and can be used in multiple ways.
There’s no rhyme or reason to where I start carving or why I start where I do. I generally do the most “fun” or “easy” parts first so it makes me feel like I made a lot of progress quickly.


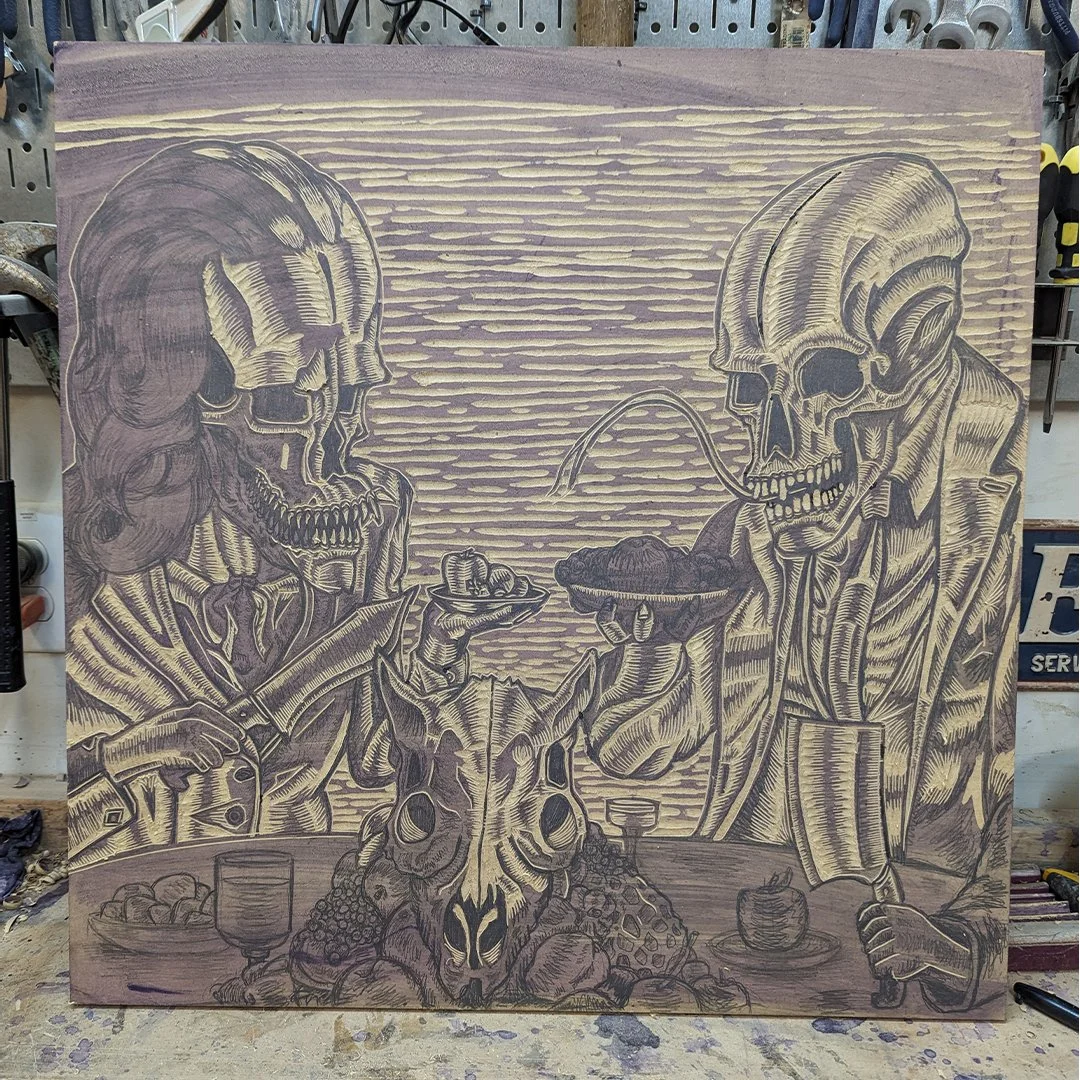
You can see why I do the “Ink Wash” here. It allows me to easily see what I have carved and what needs to be carved.

Almost done.

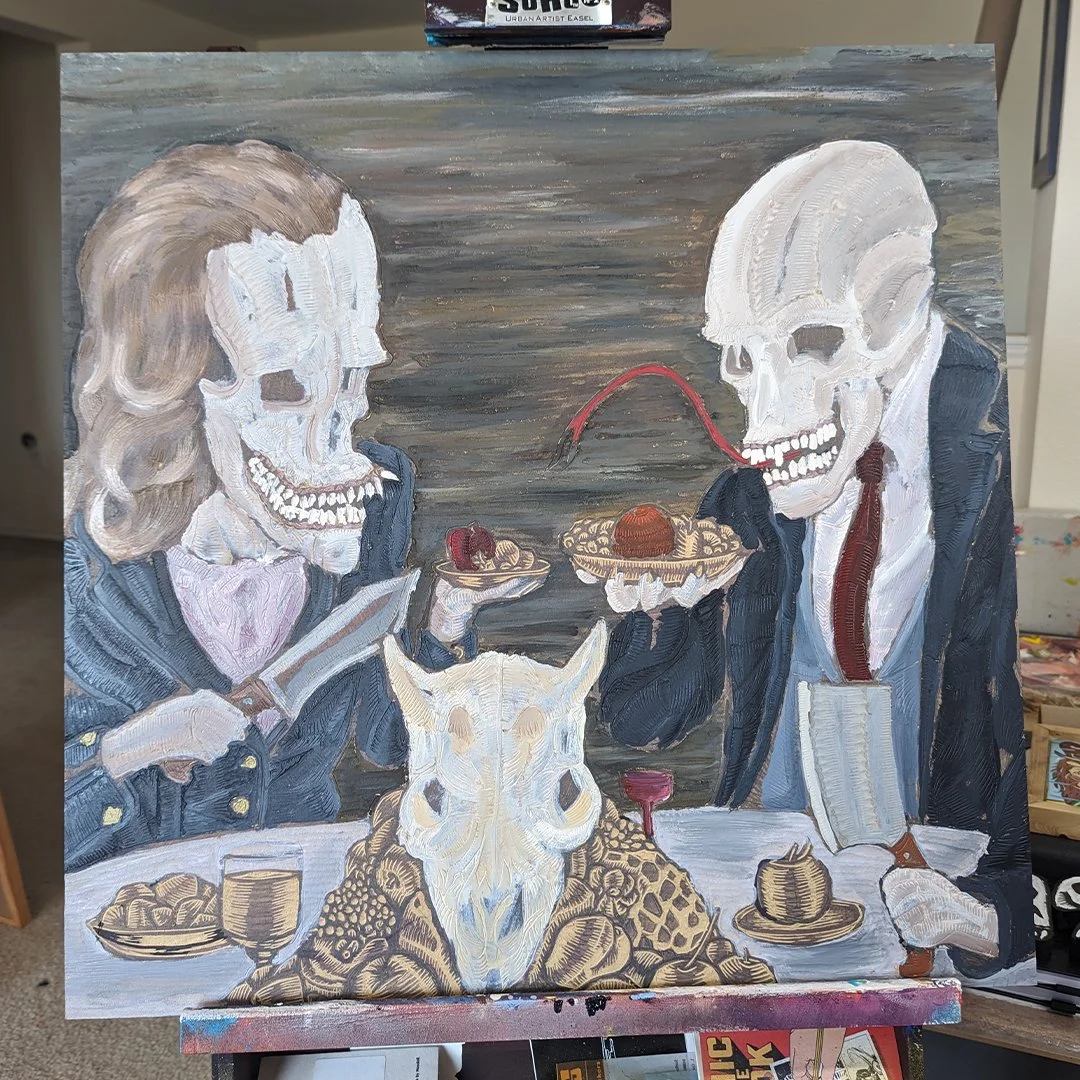
STEP 5: PAINTING
Now that the carving is finished, the next step is to paint the woodcut. I started painting my carvings about 10-12 years ago and I rarely print my boards now-a-days. Some people think thats sacrilegious but I say, “ Suck my butt.”
The thought process there is that all of the work goes into carving the board. Printing is super cool and I’ve done my fair share, BUT in my opinion all of the work goes into carving. I’ve also never been able to get the same texture and quality of line from any other process/medium.

When painting, I use acrylic paints. They dry fairly quickly and I’m able to roll a water based ink over them without any issues. As long as you don’t glob the paint on, it won’t cause any trouble down the line. If I do accidentally mush a tube of paint on the piece, I can always carve, or sand it off and restart painting.
On a larger piece like this I usually start with the background so I can figure out the tonality of the figures and foreground.

The cool thing about painting a woodcut is that you can still paint almost as you would on a traditional painting.

STEP 6: INKING
The next step is to roll ink over the now painted block with a brayer. I first spread some ink on my glass sheet (I use glass cutting boards because they can me thrown in the dishwasher and generally speaking are very hard to break) and roll the ink onto the brayer. After the brayer is loaded with ink, I roll the ink onto the board until its covered in black ink.

I use water based inks for a variety of reasons:
Reason number 1: Cleaning an oil based ink can be a paint in the ass. You have to use some harsh chemicals, and dispose of them properly. Which I totally wouldn’t fucking do.
Reason number 2: The water based ink takes to the acrylic paint and wood just as good as the oil based ink does. (If I was printing the block, I would use an oil based ink because they are far superior for printing)
Reason number 3: Fuck you, thats why.

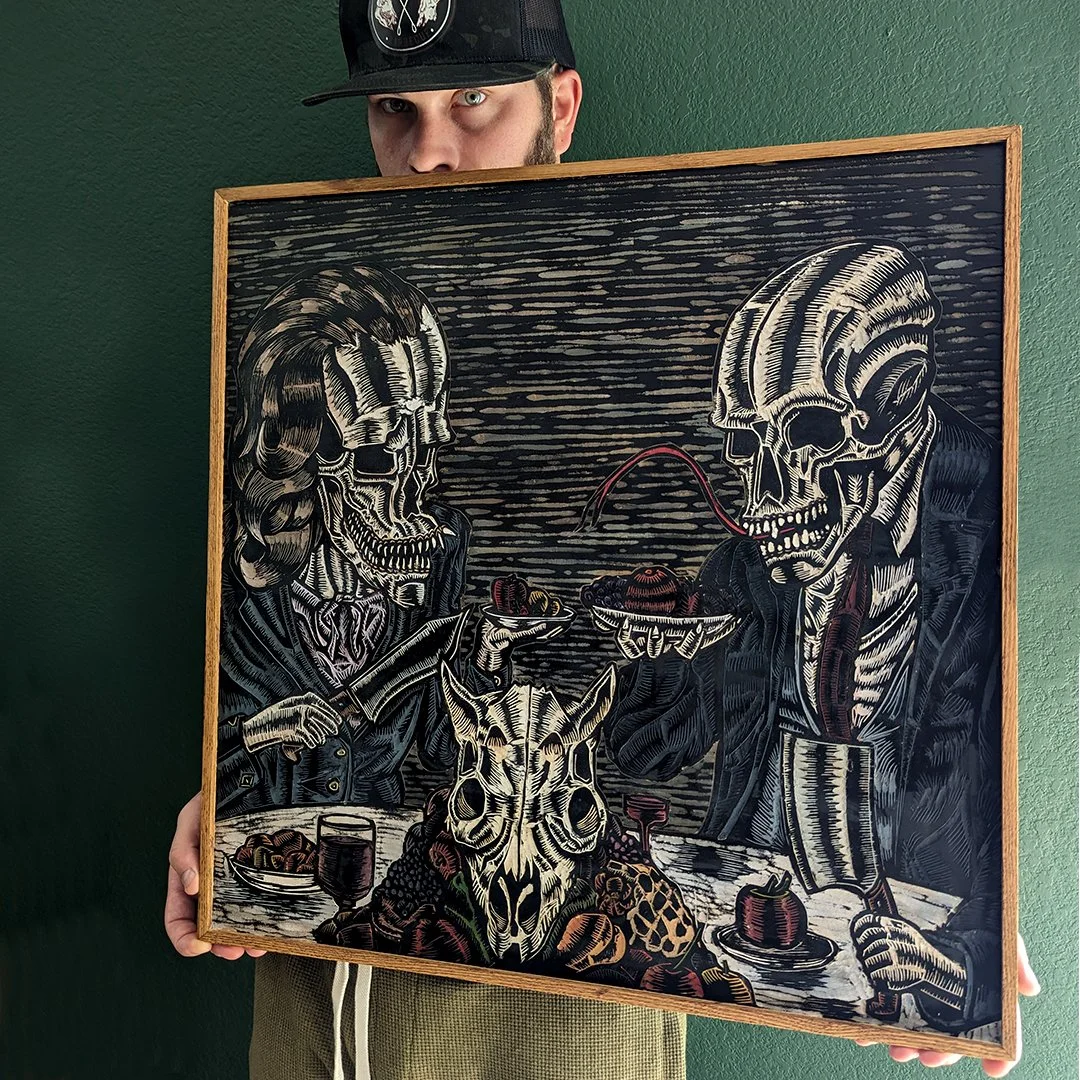
STEP 7: VARNISH
After the board is inked and the ink is dry. I use a varnish to protect the piece. I don’t have a picture of this part of the process because I forgot… So here’s a picture of my dog, Baxter instead. He be cute.

So cute, so precious.
STEP 8: FRAMING
Now that the varnish and everything is dry, I move onto the last step which is framing. For this frame, I used white oak. White oak is a great framing material because, it takes stain or finish very well, its super durable and down right dope. I used a Walnut Danish Oil as my finish. Its one of my favorite finishes to use because its easy to apply, dries fairly quickly and gives it the right amount of protection needed.

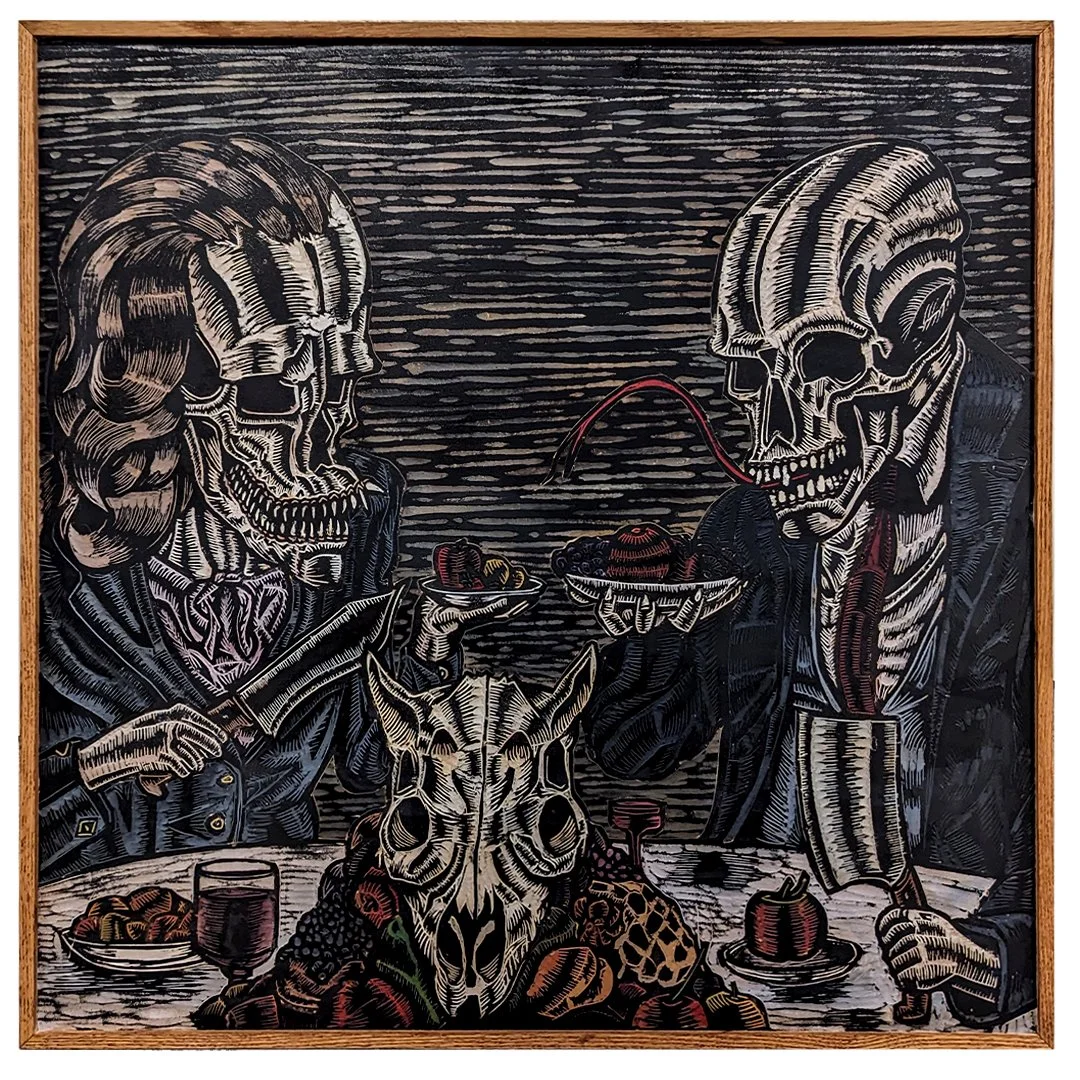
Finished Product ….Pretty neat right?
As promised, here is your random infographic. I’ve been on a Bigfoot or Sasquatch kick lately (AYOOOOOOOOO).

“I started painting as a hobby when I was little. I didn’t know I had any talent. I believe talent is just a pursued interest. Anybody can do what I do.”